See the original How to Build a Solar Powered Linksys Router article: https://lagunabeachcomputer.com/solar-powered-linksys-wrt54g-router-w-dd-wrt-and-hotspotsystem/
Solar Powered Linksys WRT54g Router w DD-wrt and HotSpotSystem
I have built a solar powered Linksys WRT54g router setup.
1. WRT54g router 12v 1a with DDwrt v24 and HotSpotSystem.com ($20 ebay)
2. 10amp solar charger controller 12v ($10 ebay)
3. 2x 10watt solar panels 12v ($22 each ebay)
4. 1.4 Ah 12v battery ($16 Frys)
5. 20dB gain Yagi directional antenna ($10 ebay)
6. Reverse RP-TNC male to RP-SMA female adapter ($2 ebay)
7. (will purchase waterproof box) $10 or similar
RESULTS:
Works perfectly but needs a bigger battery. The 1.4Ah 12v sealed battery only lasts about 2 hours when the charge stops. I read somewhere that a 7.2Ah battery should work, which makes sense if I want to get roughly 7x more power time (if 1.4Ah=2hours then 7.2Ah should equal about 10 hours…)
The solar charge controller is awesome! Each panel puts out about 15-18v in medium cloudy sunlight at about 0.6amps each. The controller charges the battery to about 13.8v, then automatically switches to a float charge to about 14.1v. After full charge I could disconnect 1 panel and still maintain power to the router and a positive charge to the battery.
The panels are chinese 10Watt models from ebay. They seem to be pretty good, as it does not take much sunlight to generate 12-14v (in the medium shade). They will easily produce 18v each in full direct sunlight.
The Yagi is a 20 or 24 dB gain directional with a 30 degree cone spread signal. Haven’t done any testing as I am still in crutches after knee surgery and don’t want to go across the street and walk around.
Update:
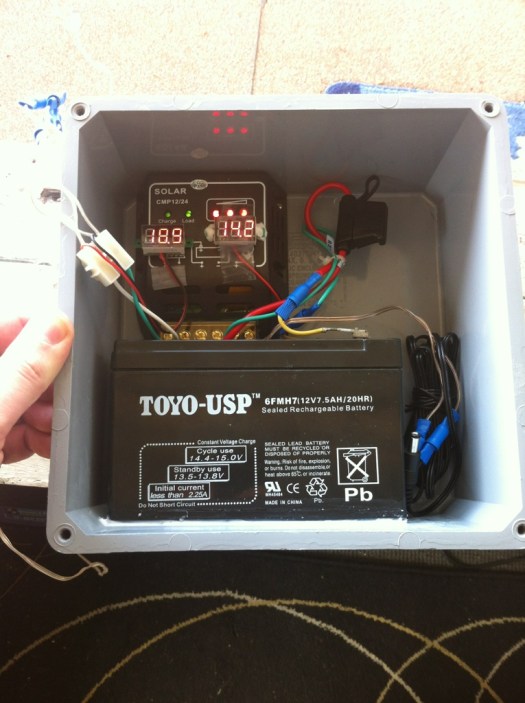
Here is the 7.5 AH 12volt battery installed. The unit will power the WRT54G router for well over 8 hours. I put the whole thing in a waterproof box, however I am planning on drilling some holes for PVC pipes to vent and to affix the antennas to.
I found this cool Solar Powered Brewery bottlecap and decided it was perfect for a heatsink. So I glued it onto the main Broadcom chip for some heat dispersion.
Bottlecap heatsink on WRT54G router.
Installed in waterproof box. Must provide ventilation. Using stock antennas until the RP-TNC and RP-BNC adapters come in the mail.
Setup in action on a sunny day.
UPDATE:
I have put together an Arduino Solar Panel Sun Tracker. Check out the code and project page!
Building Grendel’s 3dpVert for Sidewinder Joystick
I’m building the circuit now. Got the Teensy micro controller for the prjc store. The capacitors and resistors I got off eBay for less than $5 delivered. I will note that I should have bought a half sized breadboard, this one won’t fit in the USB hub case I’m going to use to encase the 3dpVert circuit.
Solidoodle 3D Printer ~ I’m buying one!
I want a Solidoodle 3D Printer sooooo bad!
Marble Machine – Ring Gear Lift – Figure 8 Transfer – Vortex Funnel
I thought this marble machine was super cool.
Marble Machine – Ring Gear Lift – Figure 8 Transfer – Vortex Funnel
[youtube=
Sidewinder 3D Pro Joystick Gameport to USB adapter
Sidewinder 3D Pro Joystick Gameport to USB adapter
See the Completed Joystick Adapter! https://lagunabeachcomputer.com/building-grend…inder-joystick/
http://grendel.koolbear.com/3dpro.htm
http://descentbb.net/viewtopic.php?t=7090
Google: 3DP-Vert
Finally, I can use the finest gameport joystick I have ever owned with Windows 7!


